3. Virtual Private Cloud#
3.1. Introduction#
A Virtual Private Cloud or VPC is AWS’s virtual representation of the networking layer. It encompasses many low-level concepts propert to traditional network operations, such as route tables, firewalls, DHCP options, etc.
Note
Most of the steps described in this section are automated by the
`platform/playbooks/aws-region.yml Ansible playbook. The interested
reader can reference it for further details not covered by the guide.
Warning
Make sure you have selected an appropriate geographical region before you start creating resources. For the purpose of this guide, you can pick the closest available region to where you are.
3.2. Preparation#
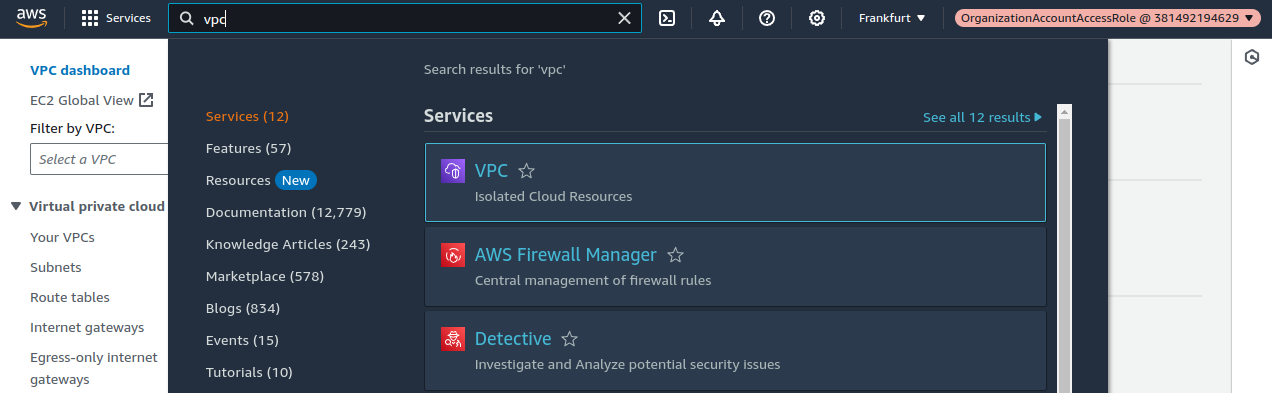
Search for the VPC service in the services search bar:
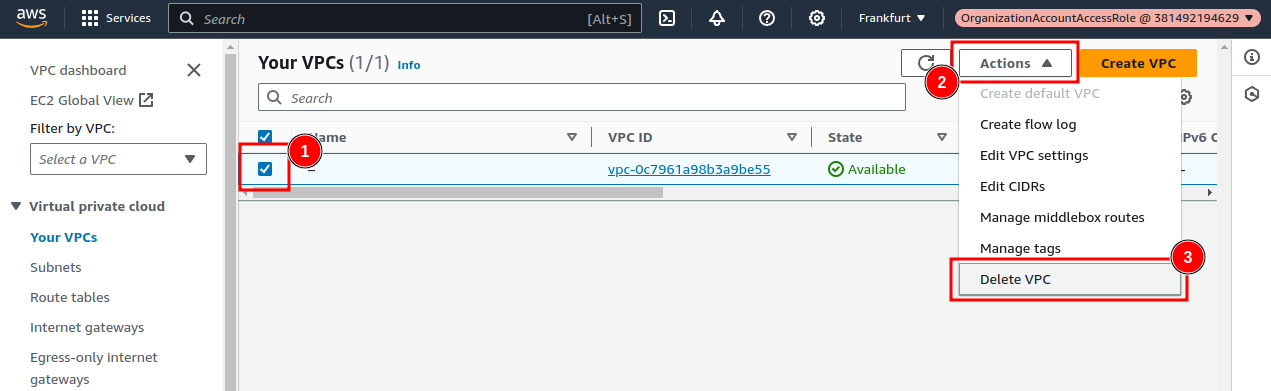
Click on “Your VPCs”, and then delete the default VPC that is being listed:
3.3. Create a new VPC#
Click on the Create VPC button on the top right corner of the VPC listing view.
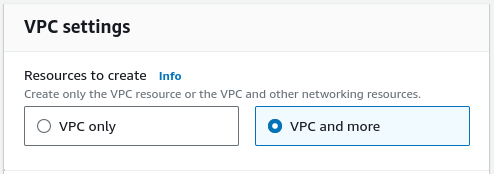
Select VPC and more to let the wizard create a whole lot of required networking resources.
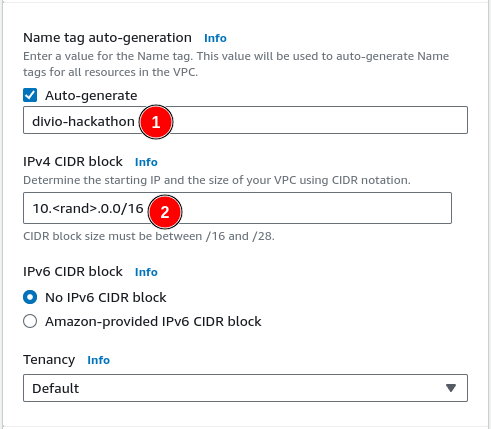
Choose to auto-generate names for all sub resources. Use
divio-hackathon as name (1).
Pick a random 10.x.0.0/16 subnet to minimize clashes with other networks
when they get peered, e.g., when establishing site-to-site VPN connections
(2).
We currently don’t support IPv6, so you can leave that disabled.
The Default tenancy is also suitable for our purposes.
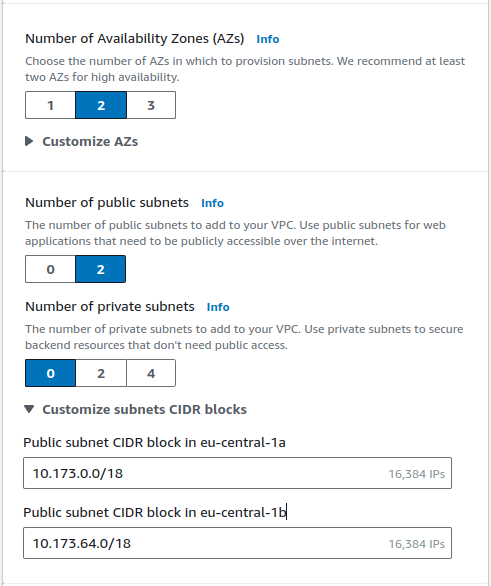
We usually run our Cloudspaces across 2 availability zones. Although we could probably optimize the setup to make use of public and private subnets, we currently run all our VMs in public subnets.
You can take a look at the IP ranges for the subnets and make adaptations if necessary (e.g., to increase the number of available IP addresses, or to keep ranges available for future subnets if necessary).
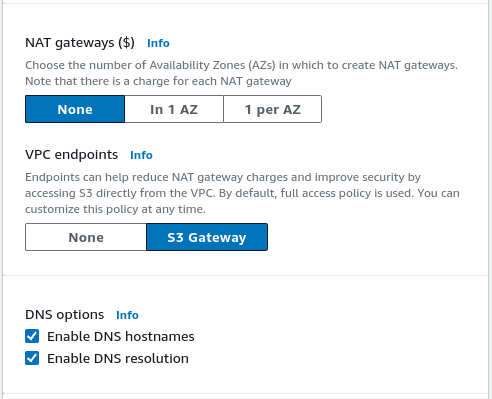
Do not provision any NAT gateways as our regions currently do not use them. They could be useful to provide static outgoing IP addresses (e.g., for allow-listing purposes), but are also relatively expensive.
Also choose to create an S3 gateway, as this enables faster and cheaper connections to S3 from inside the VPC.
Finally, enable both DNS options. Both settings are important to be able to override public records with private IP addresses within the VPC and thus enabling faster and cheaper connections when both peers reside within the VPC.
Eventually, you should end up with a preview that looks similar to the following:

Congrats, you now have a (very empty) virtual private cloud, including geo-redundant subnets, appropriate routing, and outgoing internet connectivity.
3.4. Setup a Hosted Zone#
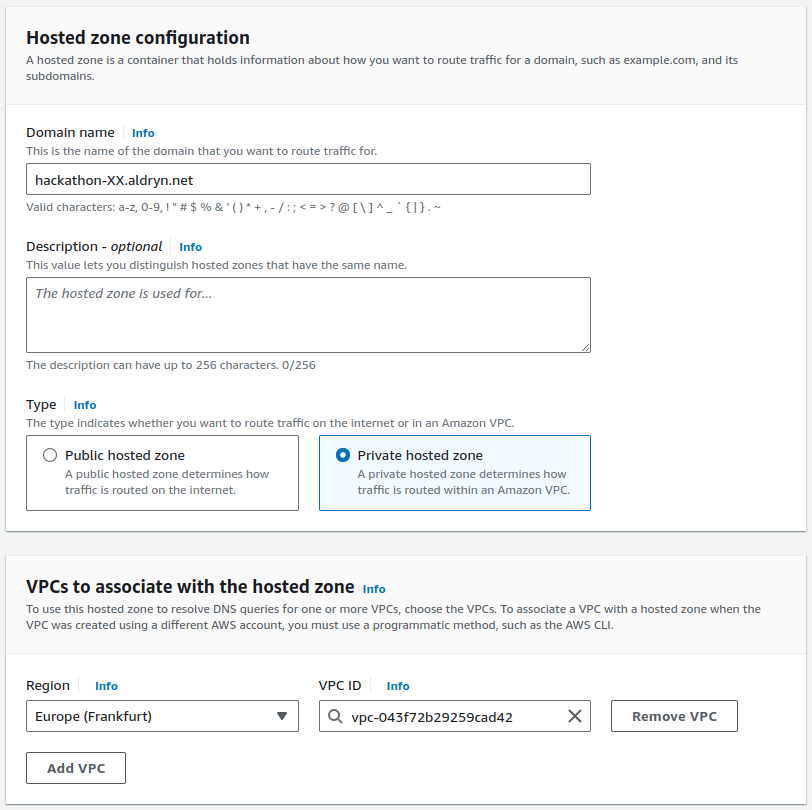
As we enabled DNS resolution for the VPC, we can now create an internal hosted zone to override individual records. To do so, go to the Route 53 dashboard, and click on Hosted zones in the left sidebar, then on Create hosted zone in the top right corner.
Use hackathon-XX.aldryn.net as name (by replacing XX with your index)
and select the VPC you just created as association target.
We also require a second hosted zone to access the individual hosts by their name. This is required for the SSH setup to know where to proxy requests to by just using the hostname.
To achieve this, it is enough to create a new private hosted zone as we did
above named internal by also providing divio-hackathon as
Description field by making sure to also assign it to the VPC.
In the next section we will take a look at how to setup our first virtual machine, that will act as initial foothold into this new network namespace.