6. Application Runners and Builders#
6.1. Introduction#
Applications runners and builders are virtual machines used by the application controller to build application docker images during deployment and to run their containers as required.
From a technical perspective, builders and runners differ only in the specification of the virtual machines that they use. Usually, we use more powerful CPUs on builders, and provision runners with larger amounts of RAM.
6.2. Provisioning Two Runners#
Thanks to the configuration we already did for the app controller, provisioning new runners is very simple:
ddt provision --deploy --count 2 divio-hackathon app-runner
Once the deployment has completed successfully, you can head over to the app controller admin and take a look at the Hosts model: two new hosts should have been added already.
Note
Mark both of them as eligible to build containers, as for this simple Cloudspace, we will not have dedicated builders.
6.3. Control Panel Setup#
While some components are still missing, we are now at a stage where we could already successfully deploy an application from within the control panel.
You can now head over to the control panel dev admin and start adding the necessary configuration.
First we have to add a Generic domain that the control panel uses to generate
subdomains for each environment. Use hackathon-XX.aldryn.io as name, select
the Let’s Encrypt + DNSimple backend, and manually set the state to
Provisioned, as shown below:

Save and note down the UUID, as we will need it in the next step.
Create a new Domain backend configuration as shown in the following image:
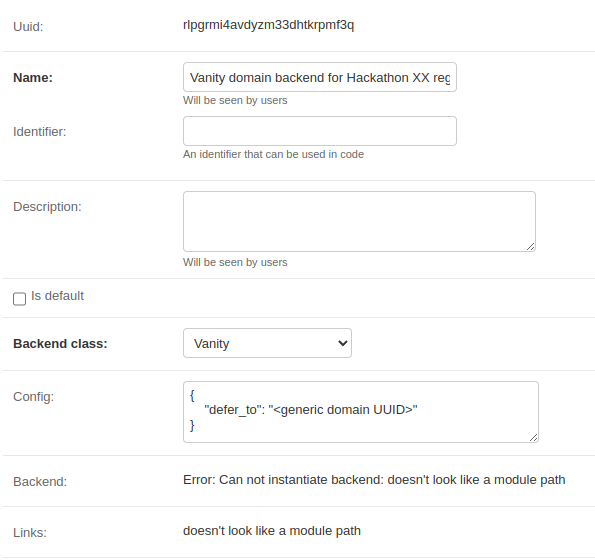
For the Config field, use the following JSON structure:
{
   "defer_to": "UUID of the generic domain"
}
Next up add a new Region. Fill out the name and the identifier, by making
sure to include the XX component as well.

Select the Vanity domain backend we just create and leave everything else as is, except for the pricing section. An example configuration is shown below:

Once you click on Save and continue editing, an additional section will appear for the region-specific configuration. Insert the config as instructed by the following image and further explained below:
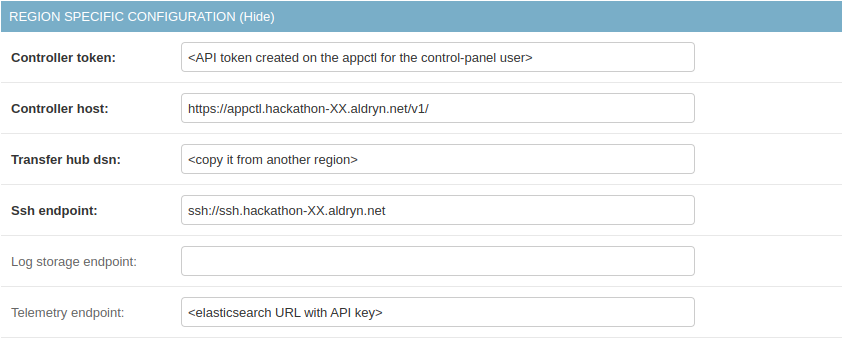
The Transfer hub dsn is always the same for all regions belonging to a
control panel instance (i.e., cp live and cp dev have two different transfer
hubs), as such you can simply copy it from another region (just make sure it
ends with tx.dev.aldryn.net).
The SSH endpoint has not yet been set up, but you can already provide a value.
For the Telemetry endpoint, use the values from 1Password formatted as follows:
https://<api:key>@<elasticsearch hostname>
The last two configuration actions to perform are:
Adding the newly created region to the “enterprise” Website plan group.
Adding a price for the newly created region to the “enterprise” Website plan.
6.4. Deploy Your First Application#
You can now create a new stateless application (the React template works well), and deploy it to the newly added Cloudspace. If you did everything correctly, the deployment should succeed and both the logs and at the metrics should be populated. However, as we do not yet have an set up the ingress tier, the deployed application will not be reachable.
In the next section we will set up all the required resources to be able to handle incoming traffic and route it to the application containers.